What is an LFO?
LFO stands for Low Frequency Oscillator. Like other oscillators, the LFO outputs a signal; a repeating waveform of the user’s choice (sine, triangle, square, etc.). However, the Low Frequency part of the name implies a unique feature; we don’t listen to the output of an LFO. The frequencies it outputs are typically below the lowest frequency a human can hear, in the 0-20 Hz range. Instead, we use the output of the LFO as a control signal, mapping it to a parameter within a synth or other system.
Different devices implement LFOs in different ways. Some have a single LFO and a limited number of parameters that it can be mapped to. This common with hardware synthesizers like the original Minimoog. With the Mini, the LFO can be routed to control either the pitch of Oscillator 3, the cut-off frequency of the low pass filter, or both simultaneously. In the context of a modular synth, an LFO may be its own standalone module and there are far greater options for potential destinations.
Software brings with it the flexibility of modular, with less cables. Take for example Twin 3, which has 6 LFOs, each of which can control almost any of the parameters of the instrument.
To illustrate how the LFO can be a useful tool for music making, let's look at some examples.
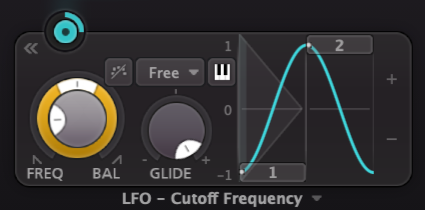 An LFO with basic settings in Twin 3
Example 1: modulating cut-off frequency
In the following example, an LFO is being used to control the cut-off frequency of Twin 3’s low pass filter. By using an LFO to modulate a parameter like this, it is as if we had our hand on that knob, moving it in real time.
The pulsing blue light at the top of the LFO represents the control signal flowing to the target parameter
Target Parameter Value vs Modulation Level
The modulation happens relative to the initial value set for the target parameter. In the example above, the cut-off frequency is the target and is set to 928 Hz. With a sine wave chosen for the modulation shape, the value will increase above 928 Hz during the positive part of the wave, and decrease below 928 Hz during the negative part of the wave. How much above and below will be determined by the modulation level, sometimes called 'strength', or 'amount'. Small values for the modulation level will result in small deviations from the initial value. Large values for for the modulation level will result in large deviations. Often, a little goes a long way, but there are plenty of use cases for more dramatic settings as well.
FabFilter plugins are a great learning tool for LFOs because the interface provides visual feedback as the parameters are modulated. Connections are made by simply clicking and dragging from a modulation source to the target. After a connection is made, the modulation level can be easily adjusted via the slider that appears when clicking on either the source or target.
Connecting a modulation source to its target.
Example 2: Modulating Multiple Parameters
In this next example, we use one LFO to modulate the cut-off frequency, while using another LFO to modulate the level of Oscillator 2. Listen to how both the filter cut-off and the level of Oscillator 2 (the higher pitch) change over time, but not at the same time. This is because they are each being modulated independently by their own LFO.
Exploring Other Shapes
Sine waves make for good modulation sources when you want subtle movement of a parameter. If you want something more pronounced, you might want to explore other shapes.
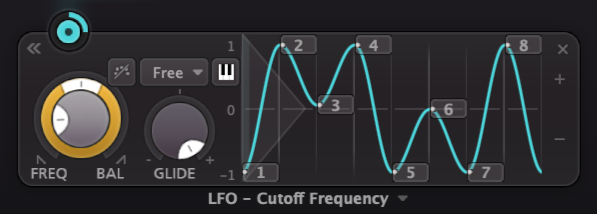
FabFilter's comprehensive XLFO modulation device allows for deep customization of parameters.
It yields a similar result as the drums in that the effect feels closely tied to the source, and less like a traditional echo with a long decay.
LFOs in a DAW
Some DAWs, such as Ableton Live or Bitwig Studio have built-in LFO effects that can be used to modulate all sorts of parameters (pan pots, send/return levels, plugin parameters, etc.).
In the next example, an LFO is used to modulate the send level of the drums to a Timeless 3 echo effect. Listen to how this result compares to the previous example; the drum groove and Timeless settings are the same (with the Wet/Dry mix in Timeless now at 100% Wet). The previous example yielded a result similar to modulating the return of the effect, which has a very different result than modulating the send. While the repeats were abruptly cut-off before, here they decay gradually.
Modulation on Modulation
LFO's offer a lot of potential for experimentation. If you want to leave some of your parameter movements to chance, you can try the 'Random' wave shape. This will output a random value at the frequency set for the LFO. With Glide turned off, the value will be held until the new value is set. Increasing Glide will smoothly transition each value into the next one.
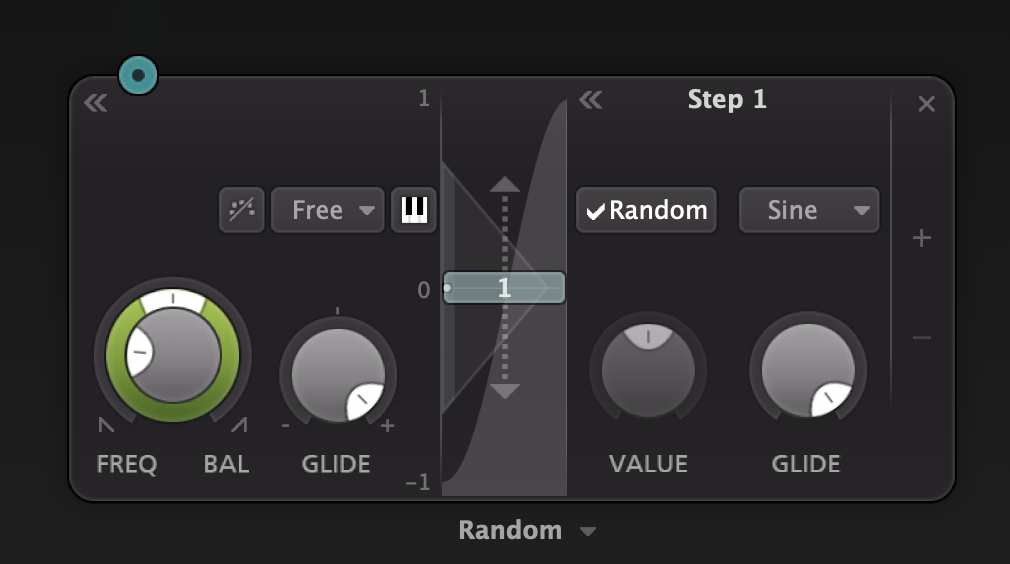
An XLFO in Timeless 3 set to random mode. Clicking on the step (in this case step 1) reveals this option.
To really spice things up, you can modulate an LFO with another LFO. In this next example, we create an LFO that randomly outputs values of 100 percent or 0 percent, essentially an on/off switch. There will be no values in between. We accomplish this by modulating a square wave LFO's frequency parameter (LFO1) with a random LFO (LFO2) using a modulation amount of at 100%. The square wave LFO is modulating the target parameter of the effect (in this case wet level) using a modulation amount of 100%.
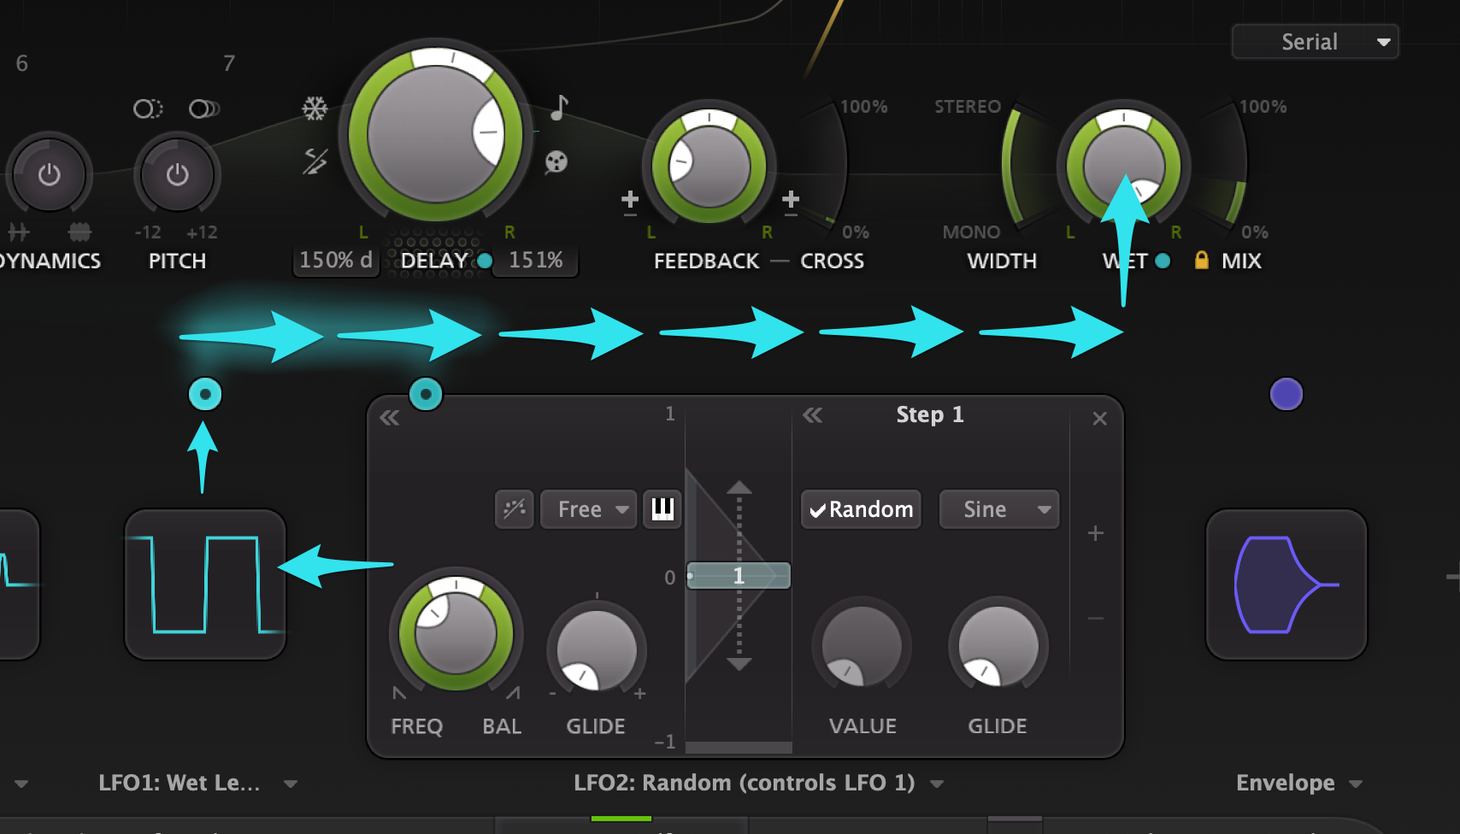
Follow the arrows along the modulation path: LFO 2 modulates LFO 1. LFO 1 modulates wet level.