This article is a beginner’s guide to creating a sound on a subtractive synth. We are going to cover the basics here, and we’ve intentionally saved lots for later. If you are synth-curious but feel overwhelmed by all of the lingo, or if you already use synths but feel bound to presets, you’re in the right place. This article should help get you started on your synthesis journey and creating your own sounds.
Signal Path
As sound travels through a subtractive synth from start to finish, it passes through a few major stages. The details of these might change from synth to synth, but the concept is usually pretty consistent. Here is how it shakes down, in order of signal flow:
1.Sound is generated using one or more oscillators
2.The signals from these oscillators are combined using a mixer
3.This combined sound passes through a filter section, which affects the spectrum
4.The filtered sound passes through an envelope generator, which affects the amplitude
That’s it! Yes, there can be more to it than that, but there doesn’t have to be. The above is all you need to get your hands dirty.
Let’s take a closer look at these steps using Twin 3 as an example. Feel free to follow along using your synth of choice (either hardware or software).
Oscillators
One way to get an idea of what an oscillator is, is to compare it to a guitar string. When we strike a guitar string it vibrates, creating a sound. Oscillators mimic this vibration by creating a repeating waveform at some frequency. The major difference between a guitar string and an oscillator is that an oscillator allows you to change the spectrum of the note drastically by choosing between a number of waveforms.
Twin 3 has four oscillators, each of which can produce a different waveform at a different pitch relative to the note played on the keyboard. Twin 3 is polyphonic, meaning that it can produce sound for multiple notes at the same time, so you can play chords. A monophonic synthesizer only produces sound for a single note at a time.
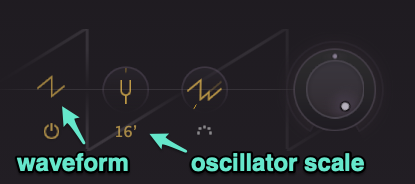
To keep things simple, let’s just look at the oscillator section. You get a few controls here but let's focus on the most important ones for now: oscillator scale and waveform. Oscillator scale dictates the octave that the note will sound in (lower number = higher pitch). Waveform dictates the spectrum of the note. You have the option to choose between sawtooth, square, square pure, triangle, triangle pure, sine, white noise and pink noise.
Meet the basic wave shapes
Just like different instruments of the orchestra, each of these wave shapes has a different harmonic profile. For instance, in the examples below, note how the triangle wave sounds relatively subdued compared to the more aggressive sawtooth or square. While some of these wave shapes may sound harsh in their raw state, keep in mind that the filter section will allow us to tame these harmonically-rich sounds into thick basses and singing leads. Meet the waveforms:
Sine
A simple sine wave, the most basic waveform without overtones
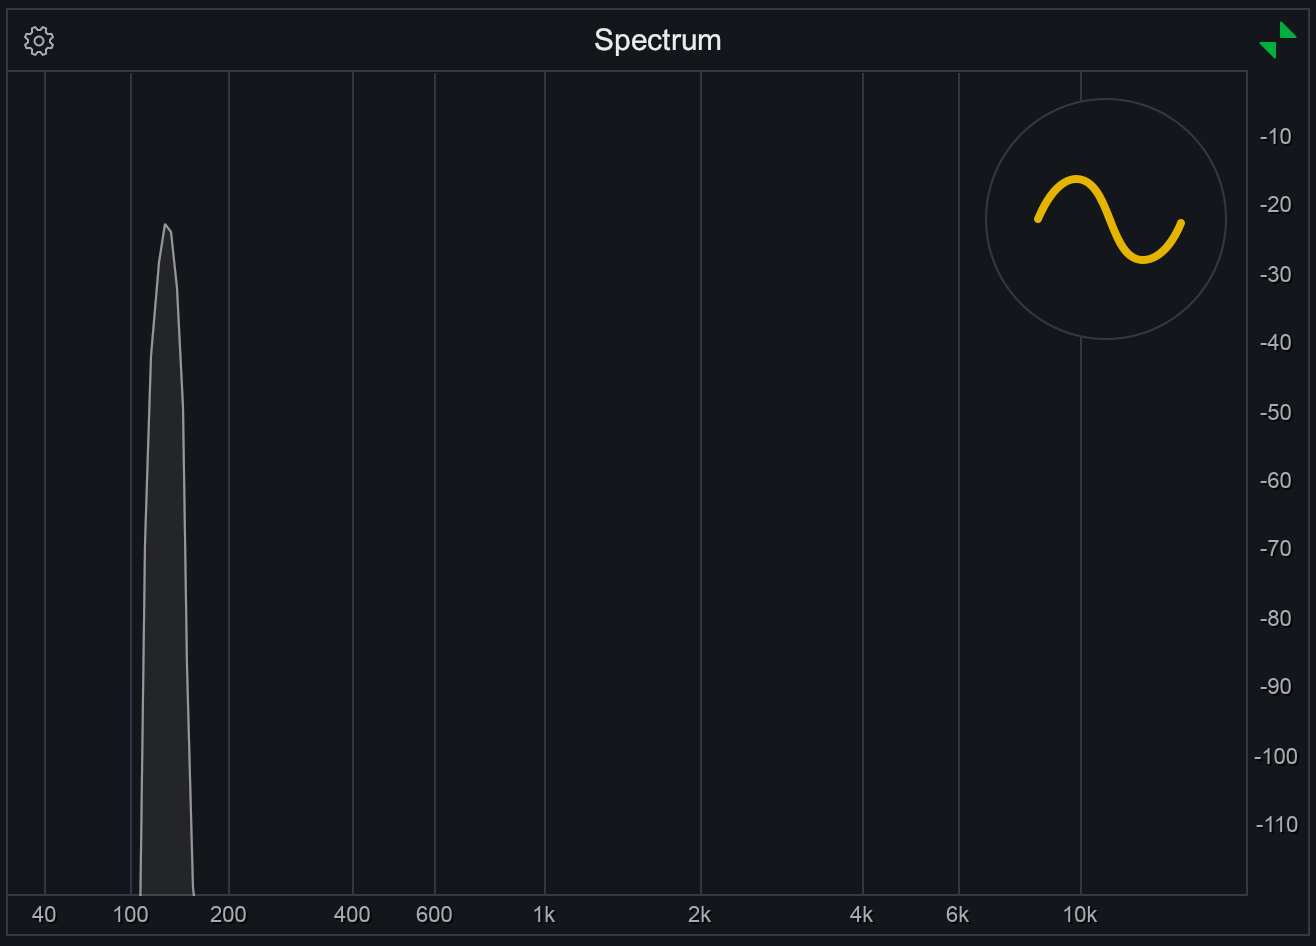 A sine wave is the purest of the basic wave shapes, with no harmonic overtones
Square
A sine wave is the purest of the basic wave shapes, with no harmonic overtones
Square
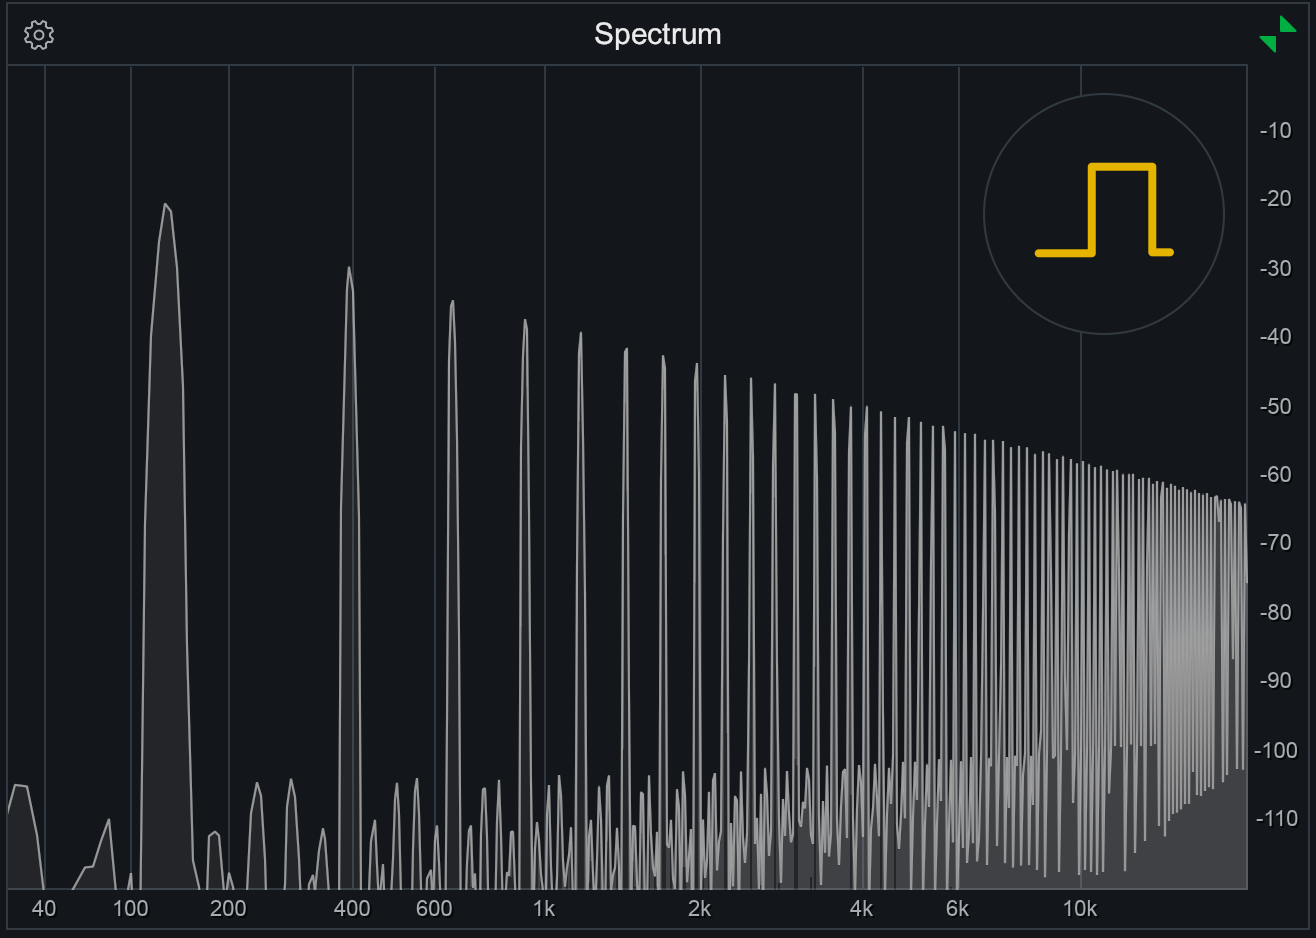 A square wave is much more harmonically rich, containing odd harmonics at a relatively high amplitude
Triangle
A soft, warm tone, with odd harmonics at lower amplitudes than the square wave
A square wave is much more harmonically rich, containing odd harmonics at a relatively high amplitude
Triangle
A soft, warm tone, with odd harmonics at lower amplitudes than the square wave
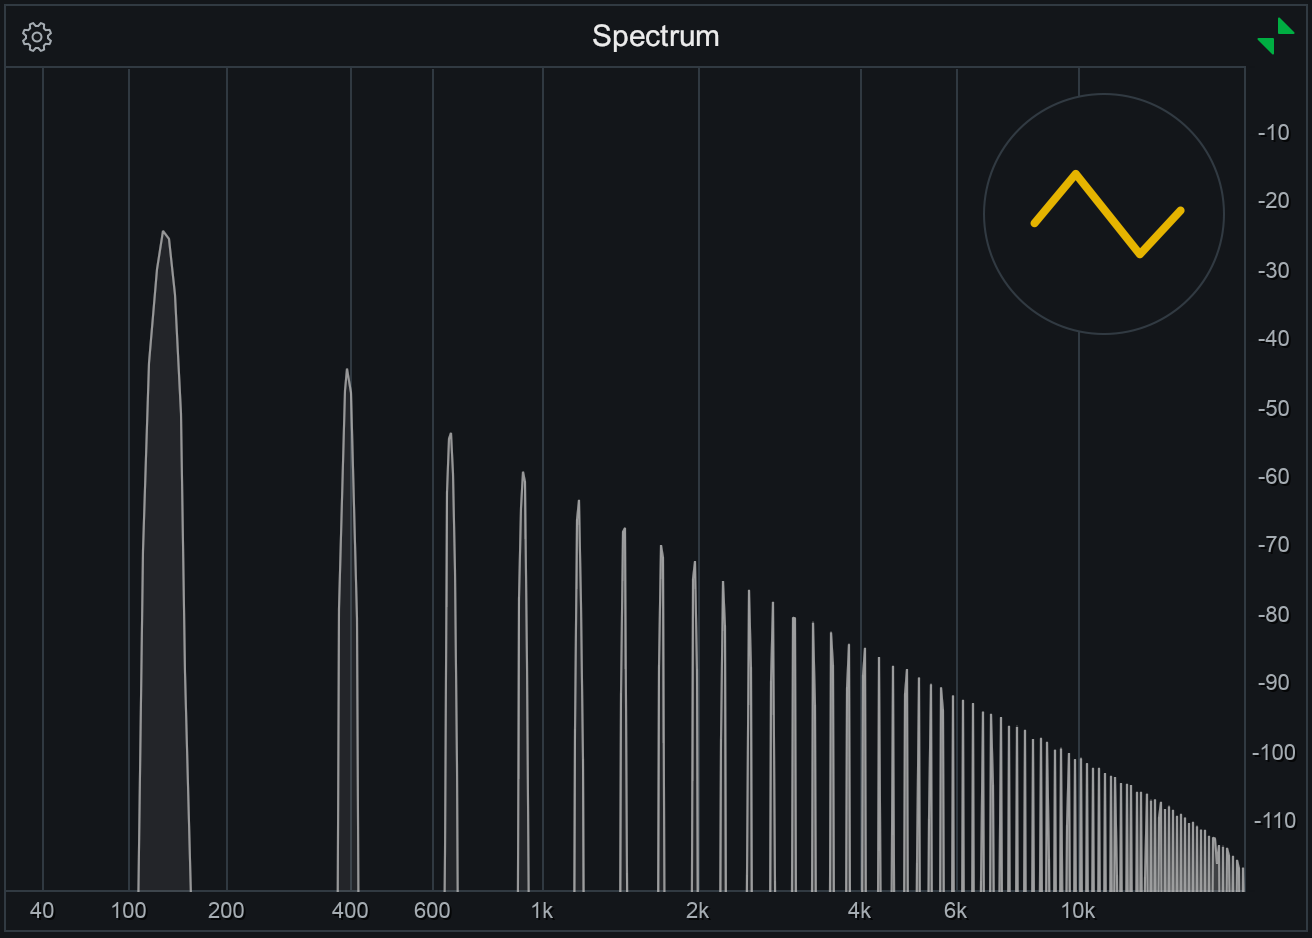 A triangle wave sounds somewhere between a sine and a square, containing odd harmonics but at a lower amplitude than the square wave
Sawtooth
A sharp, bright tone that is ideal for filtering. Rich in both odd and even harmonics
A triangle wave sounds somewhere between a sine and a square, containing odd harmonics but at a lower amplitude than the square wave
Sawtooth
A sharp, bright tone that is ideal for filtering. Rich in both odd and even harmonics
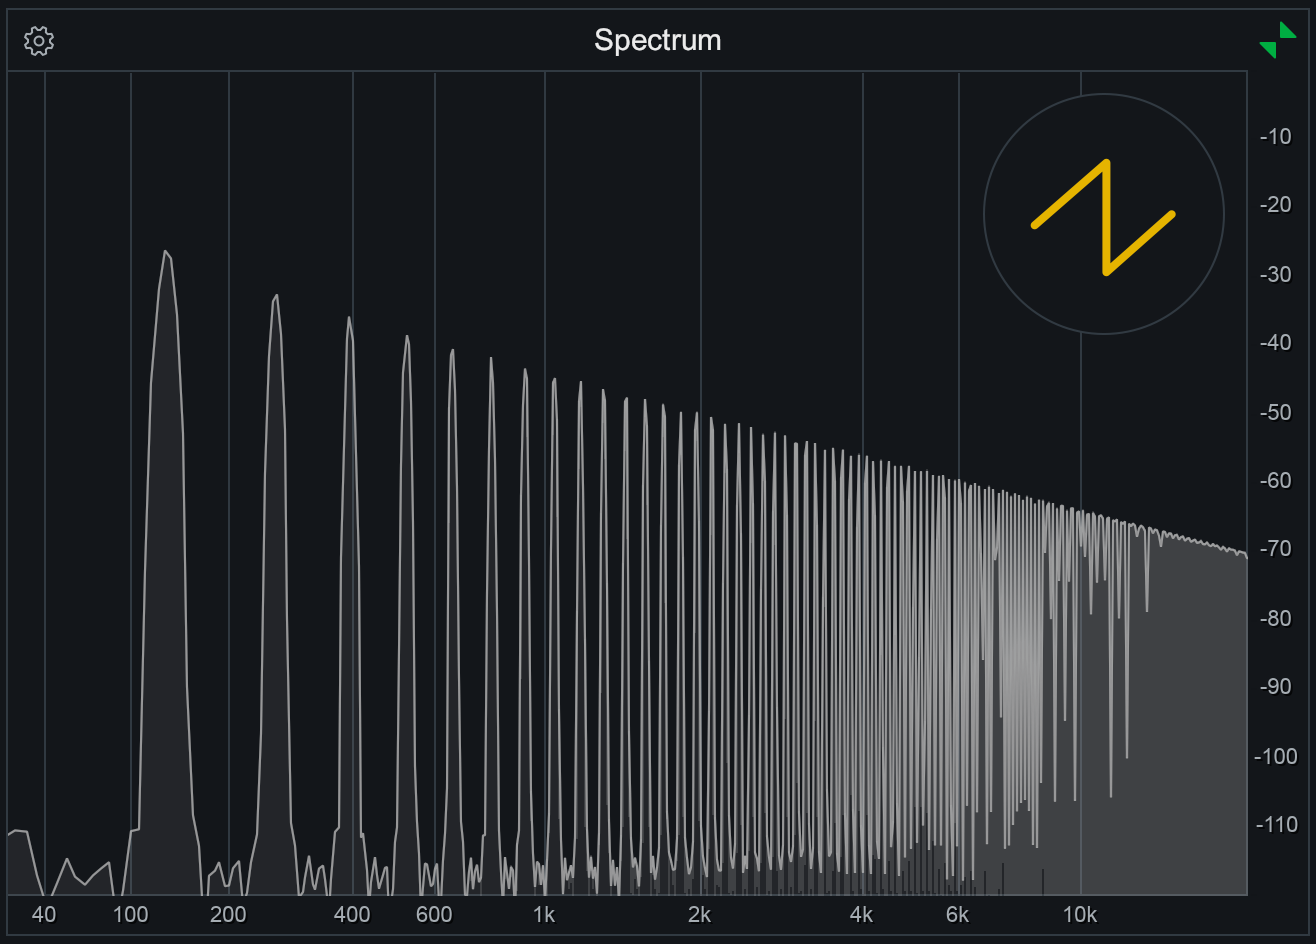 The richest of the basic waves, a sawtooth contains both even and odd harmonics at a relatively high amplitude
Mixer
The mixer in Twin 3, like most other synths, is pretty simple in concept. You have both level control as well as a a dedicated pan knob for each oscillator. As you start to experiment with using multiple oscillators, deciding how much each one should contribute to the mix can have a big impact on the final timbre.
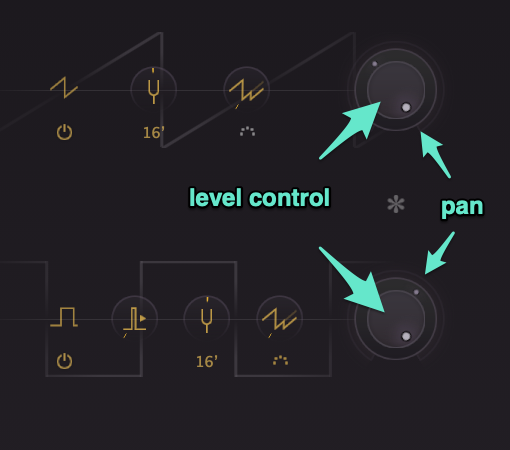
Each oscillator in Twin 3 has its own level and pan controls
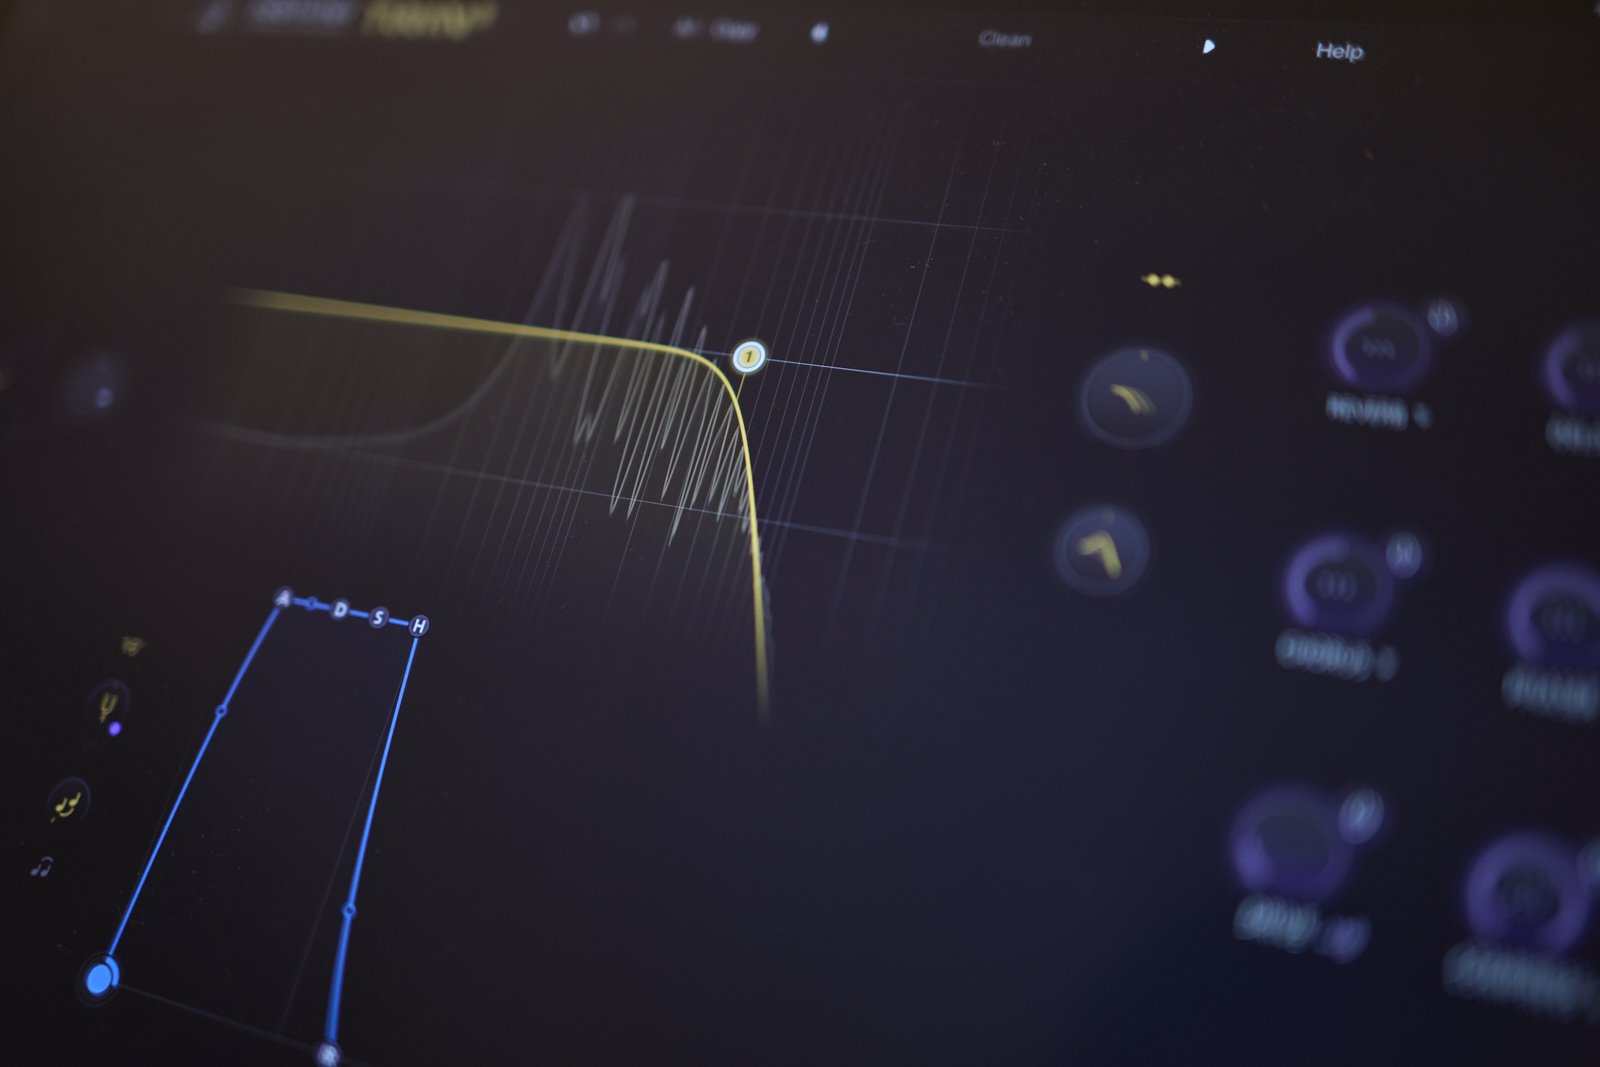
Filter
Once sound leaves the mixer, it passes through a filter section. This is what makes this kind of synth ’subtractive’; we start with a harmonically rich sound (as generated by the oscillators), and then we filter some of it out, producing the final tone. Fun fact: the human voice works the same way! Our vocal cords oscillate, creating a sound which we then filter with our mouths to produce what is heard when we speak or sing.
Different synths may have different filters available such as high pass, low pass or band pass. Twin 3 offers all of these, but let's start with the low pass filter which often is the most useful.
Remember, a low pass filter cuts all sound above the cutoff frequency. This means that all of the harsh sounding harmonic content that we generated with the oscillator can now be controlled.